


Photos of buyers
Specifications
- Origin: CN(Origin)
- Type: Air Conditioner Parts
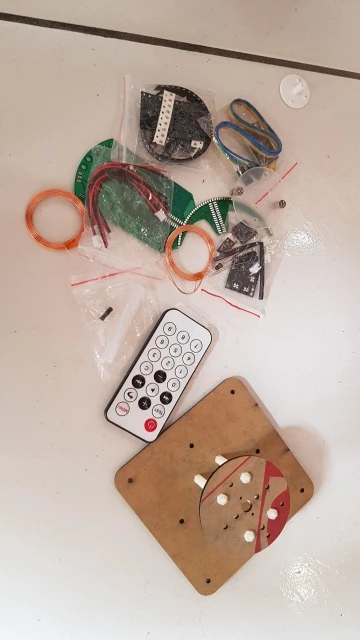
DIY POV LED kit Spherical Rotary LED Kit 56 Lamp POV Rotary Clock Parts DIY Electronic Welding Rotary Lamp Kit
Price history
- for 3 month
- for half a year
- Requires Alitools extension
Price drop notification
This item is from other sellers
Similar Products
Customer Reviews
No instruction manual in the pack! Next item is smaller than I thank.
The kit is as described. It takes some time to solder all components, especially the 56 LEDs. For most of the SMD components, the seller supplies one o more units that required, which can be useful if you break or lose some one. I do not received any manual within the kit, not even a card with a link from where download it. Although, after searching a bit on the Internet, I found the file "SKU242833.rar" in different sites, which includes manuals and software. It also includes source C programs for the MCU, and the tool to load programs (kit comes with a USB-serial adapter to program the MCU). It is important to read the assembly manual "Spherical rotating LED instruction V1.0.pdf" before starting. I managed to assemble the kit without the manual, but I have a lot of experience in electronics. Hobbyists should read the manual. Also important: on the power board there is an indication that the power supply is 12V, but really it is 5V as indicated in the manual.
Another important aspects. First, my antivirus warned me that the file "SKU242833.rar" I found in Internet, including manuals and software, had a dangerous executable that I had to eliminate, although the rest of the documents and tools can be used. This happened to me for all versions of the file that I found. Second, the MCU version that comes with the kit (STC15L2K08S2) is 3.3V, and if the power transfer coils are mounted very close together, the main board can have 4.6V power because it does not have a regulator, just a safety zener that limits to about 5.5V. Because this, the MCO of my kid burned. I had to buy another MCU and program it using the tools in the kit documentation that I found later on the internet, but I did not receive within the kit. For my second tray, I bought the 5V MCU version (STC15F2K08S2) which allows from 3.3 to 5.5V.